Illustrated Tutorial: Create Your Product's First Code-Level Promotional Video with video-shotcraft – From Setting Up the Environment to the Final Output图文教程:用 video-shotcraft 给你的产品做第一条代码级宣传片,从装环境到出片全流程
Follow along: Install the skills and Remotion dependencies → Prepare real page assets → Have the Agent storyboard the script → Render the final video and export the CapCut draft for fine-tuning. Take a look at the official Gallery before you start, and you'll be twice as efficient.
跟着做一遍:装好技能与 Remotion 依赖 → 准备真实页面素材 → 让 Agent 分镜出脚本 → 渲染成片并导出剪映草稿精修。先看一遍官方 Gallery 再动手,效率翻倍。
Step 1: Environment Preparation (one-time)第一步:环境准备(一次性的)
Prerequisites: Node.js 18 or higher (node -v verification), an environment capable of running Claude Code or Codex. Rendering is purely local CPU computation, requiring no GPU, and can be run on an ordinary laptop.
Download the video-shotcraft essential skills package from this site (see the button above) and unzip it. Then, place the video-shotcraft directory in ~/.claude/skills/ (Codex users should place it in ~/.agents/skills/).
Enter this directory and run npm install to install the Remotion dependencies. This step involves a large download, so please wait patiently for it to complete. Errors are usually due to network issues, so simply try again.
前提条件:Node.js 18 或更高(node -v 验证)、一个能跑 Claude Code 或 Codex 的环境。渲染是纯本地 CPU 计算,不需要 GPU,普通笔记本就能跑。
从本站下载 video-shotcraft 精华技能包(见上方按钮)并解压,把 video-shotcraft 目录放进 ~/.claude/skills/(Codex 用户放 ~/.agents/skills/)。
进入该目录执行 npm install 安装 Remotion 依赖——这一步下载量较大,耐心等它跑完,报错通常是网络问题,重试即可。
Step 2: Browse the Gallery first, then select the assets第二步:先逛 Gallery,再选素材
Before you start, spend ten minutes browsing the official online Gallery (the link is in the README). There are 150 shots with real-time previews. Pick out 3–5 formula names that suit the character of your product, and then simply specify them by name when you create the storyboard later.
Prepare materials: Ensure that the pages you want to display can be accessed normally. If the pages have anti-scraping measures or require login, first take screenshots manually and save them to a local directory. The skill supports using local images directly as materials.
Think clearly about the selling point of a single sentence: A promotional video is not a list of features. First, write down "one thing this video should make the audience remember", and feed this sentence to the Agent when storyboarding.
动手前先花十分钟浏览官方在线 Gallery(README 里有链接),150 个镜头实时预览,挑出 3-5 个适合你产品气质的配方名,后面分镜时直接点名要它们。
准备素材:确保你要展示的页面可以正常访问;页面有反爬或需要登录的,先手动截图存到本地目录,技能支持直接用本地图片作为素材。
想清楚一句话卖点:宣传片不是功能罗列,先写下「这条片子要让观众记住的一件事」,分镜时把这句话喂给 Agent。
Step 3: Have the Agent create storyboards and renderings第三步:让 Agent 分镜与渲染
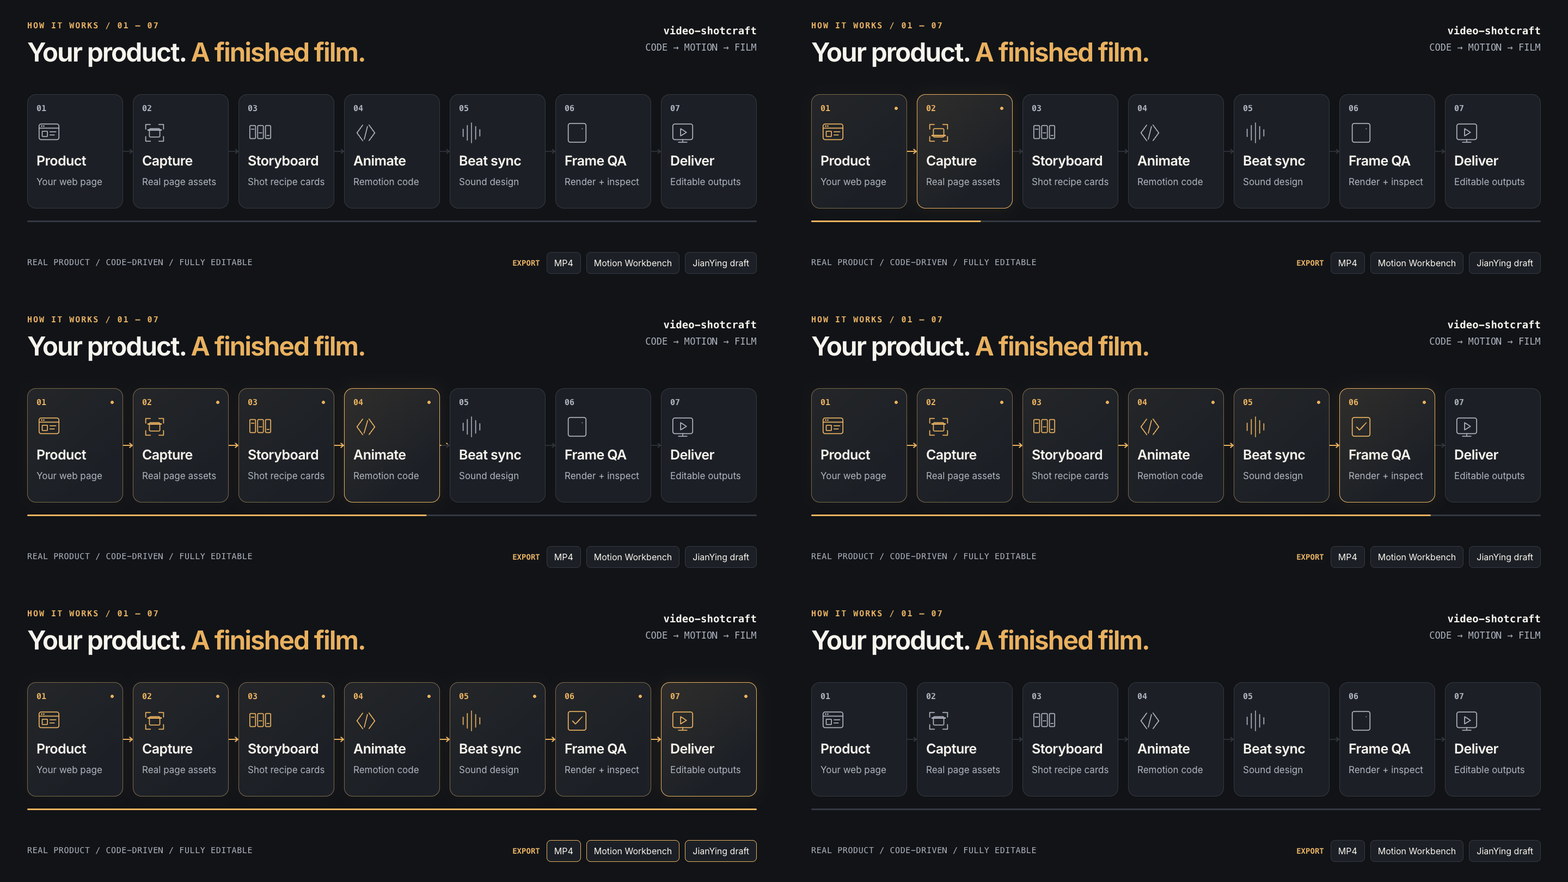
Restart Claude Code to load the skill, and say to it: "Use video-shotcraft to create a 30-second promotional video for my product. The product is XX, and I want to highlight YY. Use the following shot formulas I've chosen: A, B, C".
It will first truly capture your page (or read your local screenshots), and then produce a storyboard – this step must be reviewed manually: shot order, copy, and beat points. It is now the cheapest to make changes.
Confirm and let it render. After a few minutes to over ten minutes, you will get the final MP4 video, as well as a Motion Workbench project directory – you can change the text and switch shots here, without having to start over.
重启 Claude Code 使技能加载,对它说:「用 video-shotcraft 给我的产品做一个 30 秒宣传片,产品是 XX,想突出 YY,用我选的这几个镜头配方:A、B、C」。
它会先真实抓取你的页面(或读取你的本地截图),然后产出分镜脚本——这一步务必人工过一遍:镜头顺序、文案、节拍点,现在改成本最低。
确认后让它渲染。几分钟到十几分钟后你会得到 MP4 成片,以及一个 Motion Workbench 工程目录——改文案、换镜头都在这里改,不用从头再来。
Step 4: Two paths after completion第四步:成片后的两条路
Option 1 (Fast): Use the final video directly. The frame-by-frame quality control process has already eliminated most of the problematic footage for you, making it suitable for posting on social media, official websites, and product update announcements.
Option 2 (Refinement): Export the CapCut draft and continue refining it. The skill includes built-in CapCut export. The final shots, text, and audio tracks will be converted into a CapCut project, allowing you to add voiceovers, adjust subtitles, and change the background music.
The key to iteration: Only suggest one change at a time ("Extend the second shot by one more second", "Change the copy to XX"). Re-rendering is much faster than making major changes to the script. After doing two or three of these, you'll get the hang of how this pipeline works.
路线一(快):直接用成片。逐帧质检环节已经替你排掉了大部分翻车画面,适合发社交媒体、官网、产品更新公告。
路线二(精):导出剪映草稿继续精修。技能内置剪映导出,成片的镜头、文案、音轨会变成剪映工程,你可以在此基础上加配音、调字幕、换 BGM。
迭代心法:每次只提一个修改点(「第二个镜头停留再长一秒」「文案换成 XX」),重新渲染比大改脚本能快得多。做上两三条,你就摸清这套流水线的脾气了。
Problem Encountered遇到问题
npm install failed: Try again after switching to a domestic mirror (npm config set registry https://registry.npmmirror.com); Error during rendering: Mostly due to insufficient memory. Close other large programs or split the video into two parts and render them separately. The skills package that accompanies this article can be found via the download button above.
npm install 失败:切换国内镜像(npm config set registry https://registry.npmmirror.com)后重试;渲染中途报错:多为内存不足,关掉其他大程序或把片子拆成两段分别渲染。本文配套技能包见上方下载按钮。
想马上用起来?去「AI工具」栏挑一个直接下载,或在「AI教程」里跟着图文步骤做一遍。
去 AI工具 → 看 AI教程 →阅读与点赞数据保存在你的浏览器本地,欢迎留下你的想法。
 今日正能量学一点,用一点;今天种下的种子,会长成明天的能力。去免费下载专区 →广告
评论 文明发言,让讨论更有价值